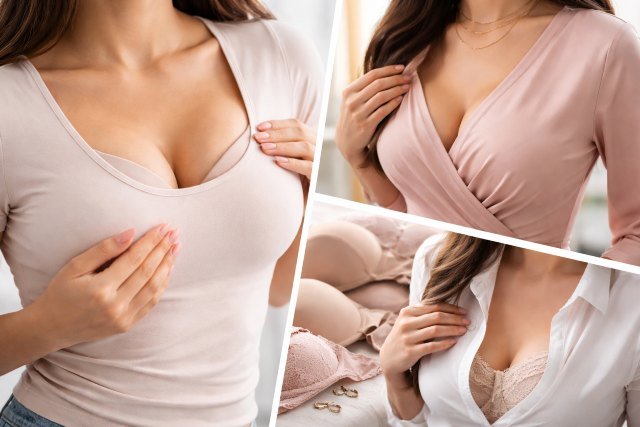
An overflowing bra can turn even the cutest outfit into something you feel the need to tug, adjust, or hide. You put on a fitted tee, a satin blouse, or a bodycon dress and suddenly there’s that telltale “spill” at the top, a side bulge near the armpit, or a weird bump where the cup edge ends. It’s annoying, distracting, and it can make you blame your clothes when the real issue is happening underneath.
Here’s the good news: you can fix the look quickly. Sometimes the solution is as simple as a different bra style for that outfit. Sometimes it’s a one-time sizing tweak. And sometimes it’s a styling trick that smooths everything out without changing your whole wardrobe. This guide breaks it all down in a practical way, so you can get a seamless finish and feel confident in your outfits.
What “overflowing bra” really means (and what it usually looks like)
An overflowing bra is basically spillage. The cups are not fully containing breast tissue, so it pushes up and out, usually over the top edge, sometimes at the sides near your underarms, and sometimes even under the cup line. ThirdLove describes overflow as breast tissue getting pushed over the top, sides, or underarms because the cups aren’t fully encasing the bust.
Common signs you’re dealing with overflow:
- A “double bump” at the top of the cup (often called quad-boob)
- A ridge or line that shows through shirts
- Side bulging near the armpit even when the band feels “fine”
- The center of the bra doesn’t sit flat on your chest
- Your outfit looks bumpy in photos, especially in direct lighting
And if you’re thinking, “But my size has always been this,” you’re still not weird. Research and clinical discussions around bra fit suggest a very large portion of women wear the wrong bra size, in some cases reported as extremely high.
Why overflow shows up more in some outfits than others
Overflow is not equally visible in every fabric. You can wear the same bra under two tops and only one looks “off.”
Here’s why:
- Thin knits and ribbed tees show edges and bulges easily.
- Satin, silk-like fabrics, and clingy jersey highlight texture and raised lines.
- Light colors and bright lighting emphasize shadows and contours.
- High necklines push tissue upward, making top-spill more noticeable.
- Deep V tops can expose the top edge of the cup, so any bulge is obvious.
So if you’ve ever felt like your bra “works” under hoodies but fails under cute tops, that’s normal. The outfit is simply exposing what the thicker layers were hiding.
The foundation: the 2-minute fit check that makes outfits look better
Styling tricks help a lot, but if you’re truly overflowing, the fastest way to look seamless is to stop the overflow at the source.
Check 1: The band does most of the work
A lot of people focus on straps, but the band is where support comes from. Lingerie experts often point out that most support comes from the band, not the straps.
If the band rides up your back, it’s too loose. When the band is too loose, breasts can sink and spread, which makes overflow and side bulge look worse under clothes.
Check 2: The cups should fully contain the bust
If the top edge cuts in, you’re likely in too small a cup or a cup shape that doesn’t match your breast shape. That cutting line is exactly what shows through tees and fitted tops.
Check 3: The center should sit flat (for wired bras)
If the center front is floating, the cups may be too small or the style may be wrong for you, which can push tissue upward.
Check 4: Do the “scoop and swoop” placement
A big reason people think they have overflow is because tissue isn’t seated properly in the cups. When you put the bra on, lean slightly forward and gently scoop tissue from the side into the cup. It’s a simple technique that improves containment and smoothness for many people.
If doing this suddenly creates overflow that you didn’t see before, that’s actually useful info. It usually means the cup size was borderline and you were previously “hiding” tissue outside the cup.
Styling goal: seamless outfits without constantly adjusting
Let’s get you that clean, smooth look. The strategies below work even if you’re not shopping for a whole new drawer of bras.
Outfit-based fixes for overflowing bra
1) T-shirts and fitted tops: go for smooth cups and the right neckline match
A fitted tee is the ultimate truth-teller. If you want seamless under T-shirts, a molded, smooth-cup style is usually the easiest path. T-shirt bras are designed to look invisible under thin fabrics and commonly use molded cups to reduce seams and texture.
What works best under tees:
- Molded cups (less texture)
- Smoother fabrics like microfiber
- Full coverage or balconette styles depending on where you spill
- Wider side wings if your issue is side bulge
Quick styling trick:
- Choose a tee with slightly thicker cotton or a double-knit. Even a small increase in fabric weight can blur cup edges and reduce “bra line” visibility.
If you keep seeing top spill under tees:
- Try one cup size up in the same band, or a bra with a more open top line if the cup edge is cutting in.
- Avoid cups with a tight elastic edge at the top if you’re fuller on top.
2) Button-down shirts and blouses: stop gaping and stop spillage
Button-downs can be brutal because overflow creates volume at the center, which can cause that annoying button gap.
Best bra traits under button-downs:
- Minimizing or lightly lined cups (less forward “push”)
- A stable band for lifted shape
- Side support panels if you tend to spill sideways
Styling trick that looks polished:
- Wear a silky cami or smooth layering tank underneath. It softens lines, prevents show-through, and gives the shirt a cleaner drape.
3) Dresses: match the bra to the neckline and fabric
With dresses, your best option depends on two things:
- the neckline
- the fabric cling level
For bodycon or clingy dresses:
- Seamless, smooth-cup bras reduce texture.
- A longline band can smooth the back and sides.
For wrap dresses or V-necks:
- A plunge style can work, but if you overflow at the top, a plunge with too-low coverage can make it worse. You want a plunge that still has enough cup height to contain you.
Styling trick for clingy fabric:
- A light smoothing slip under the dress can blur small lines and create a more even silhouette. It’s one of the simplest “seamless” hacks that doesn’t depend on finding the perfect bra overnight.
4) Off-shoulder and wide neck tops: choose straps that disappear but support stays
Off-shoulder and wide necklines make straps tricky, and when straps slip, the bra can shift, which increases overflow.
Better options:
- Multiway bras with adjustable strap placement
- Balconette styles that sit lower on the chest while still containing
- Stick-on solutions can work for some outfits, but they are not ideal if you need strong lift and containment
Styling trick:
- Use fashion tape for the top, not for the bra. Secure the neckline so you’re not constantly pulling the top up, which can push tissue upward and create more spill.
5) Athleisure and sporty outfits: containment beats cleavage
If your everyday style includes active sets, crop tops, or fitted tanks, overflow often happens because the support level is too low or the compression is uneven.
Try:
- Sports bras designed for your activity level
- If you’re fuller bust, look for designs that separate and contain rather than flatten awkwardly
And remember: if you’re overflowing in a sports bra, it’s not just a style issue. It can be a support issue.
Bra-style match guide (simple and practical)
Here’s a quick guide you can use when getting dressed.
| Outfit type | Most seamless bra styles | Avoid if you overflow |
|---|---|---|
| Thin t-shirts, ribbed tops | Molded “t-shirt” bras, smooth microfiber | Tight elastic cup edges that cut in |
| Satin blouses | Smooth, lightly lined or unlined smooth cup | Heavy lace texture under satin |
| Button-down shirts | Side-support styles, minimizing or lightly lined | Push-up that increases center volume |
| Bodycon dresses | Seamless cup + smoothing back/longline | Seamed lace cups under clingy fabric |
| V-necks | Supportive plunge with adequate coverage | Very low plunge that invites top spill |
| Off-shoulder tops | Multiway, balconette, secure band | Loose bands that shift when straps change |
T-shirt bras are often recommended because they’re designed to be invisible under fitted clothing due to their smooth, molded structure.
Easy “seamless” tricks you can do today (no shopping required)
1) Adjust the band before you adjust the straps
If you tighten straps to fix overflow, you often make the top spill worse because the straps pull tissue upward into the cup edge. Start with the band. A firm band provides the base support that improves shape under clothes.
2) Re-seat breast tissue in the cups
Do the scoop-and-swoop method once, then check the top edge. This placement technique is commonly recommended in bra fitting education because it helps the cup contain tissue properly.
3) Choose fabrics that forgive
If you already know you’ll be wearing a “problem bra” for a long day, pick a top with:
- thicker knit
- prints
- textured fabric (like waffle knit or ruching)
These hide lines better than thin, flat, bright fabrics.
4) Use a smoothing layer strategically
A lightweight camisole, slip, or shaping tank can blur cup edges and side bulge. You don’t need heavy shapewear to get the effect. The goal is a smoother outer surface so your top drapes cleanly.
5) Don’t ignore side bulge, it’s usually a cup or wing issue
Side overflow often means the cup is too narrow, the band is too small, or the side wing is too short. Choosing bras with taller wings and side support can dramatically change how seamless your tops look.
If you’re overflowing, is it always the wrong size?
Not always. Sometimes it’s the wrong shape.
Two people can wear the same “size” and have totally different results because:
- one is fuller on top
- one is fuller on the bottom
- one is wide-set
- one has more projected tissue
That’s why one bra can cause overflow while another in the same size looks perfect. Fit research also highlights that incorrect fit can come from specific components like cups, bands, straps, and underwire shape, not just the labeled size.
How to shop smarter for a seamless look (without buying 10 bras)
If you do decide to shop, focus on solving the overflow first. Here’s a simple approach.
Step 1: Fix containment
If you’re spilling at the top, try:
- one cup size up in the same band
- a fuller coverage cup
- a style with a more open top line (depending on where you’re full)
Step 2: Fix the surface
For seamless outfits, look for:
- smooth cup fabric
- minimal seams
- no heavy lace in the cup area if you wear thin tops
Step 3: Fix the edges
If the back and sides show lines, prioritize:
- wider side wings
- smoothing back bands
- softer edges that don’t dig in
Frequently asked questions
How do I stop an overflowing bra from showing under a tight shirt?
Use a smooth-cup bra (often called a t-shirt bra), reseat tissue using scoop-and-swoop, and avoid tops made from very thin ribbed fabric. Smooth molded cups are specifically designed to look invisible under fitted clothing.
Why does overflow look worse in photos?
Cameras exaggerate shadows and raised lines. Bright light from the front or side can make cup edges and bulges look more obvious than they do in a mirror.
Should I size up the band to stop overflow?
Usually no. A too-loose band reduces support and can make the cups sit incorrectly. Many fitting guides emphasize the band’s importance for support.
Overflow is more commonly a cup size or cup shape issue.
Is side spillage normal?
A little softness can be normal, but visible bulging that changes the look of your outfit often means the cup shape, wing height, or cup volume is not ideal for you.
Conclusion: a seamless outfit starts under the outfit
An overflowing bra is not a personal failure and it’s not “just how your body is.” Most of the time, it’s a fixable mismatch between cup containment, bra shape, and the fabric you’re wearing on top. Once you understand what’s causing the spill, you can solve it in a way that actually fits your life, whether that means switching to smoother cups for tees, choosing smarter necklines, adding a light smoothing layer, or simply adjusting fit and placement.
If you want the fastest win, start with two things: make sure tissue is seated correctly in the cups, and choose a bra surface that matches your outfit fabric. Those two alone can take an overflowing look to a smooth one. And if you decide to shop, remember you’re not just buying a size, you’re choosing a shape. Knowing that is the difference between “almost fine” and truly seamless.
In the end, feeling confident in your outfit is what matters. When the foundation fits, everything you wear on top looks more intentional, more polished, and honestly, more you. If you ever get curious about how this undergarment evolved and why designs differ so much today, a quick peek at bra history can be surprisingly interesting.