

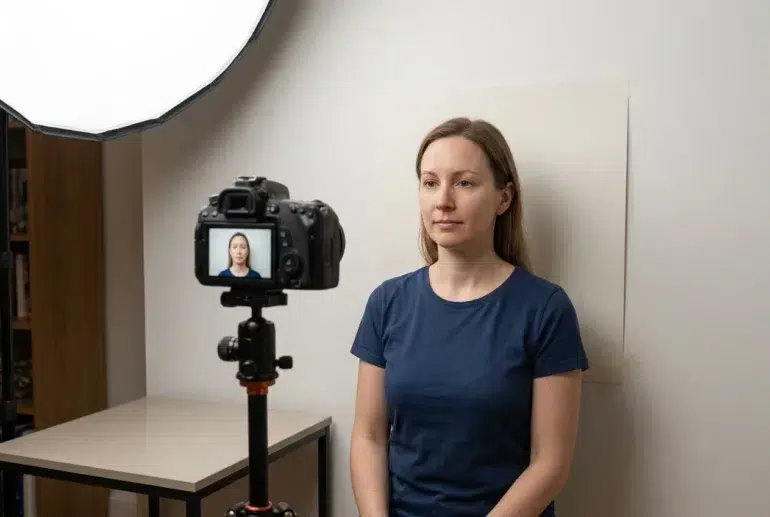
The process to resize photo to passport size at home can save both time and money, but it requires more than simply snapping a quick picture. Passport, visa, and ID photos must meet specific rules for size, background, lighting, image quality, and facial positioning. A photo that looks perfectly fine on your phone may still be rejected if it is blurry, poorly cropped, over-edited, or saved incorrectly.
To prepare a passport photo successfully, start by checking the official requirements, take a clear front-facing image, crop it carefully, use a simple background, and avoid heavy retouching. Getting the basics right from the beginning makes the editing process much easier.
Check The Official Passport Photo Requirements First
Before editing anything, verify the requirements for your specific application. Different countries and organizations often use different standards. Some require a 2 x 2-inch photo, while others use 35 x 45 mm or another format.
Requirements may also specify:
- Head size and positioning
- Eye placement
- Background color
- File format
- Image dimensions
- DPI or print resolution
- Maximum file size
Visa applications, passports, driver’s licenses, school IDs, and resumes may all have different photo standards.
The correct passport photo size depends on the country and document type, so users should confirm the official requirements before cropping or resizing.
Take The Right Photo Before You Resize It
Many people focus on editing tools when the quality of the original image matters far more. For the best results:
- Use even lighting without strong shadows.
- Stand in front of a plain, light-colored passport photo background.
- Face the camera directly.
- Keep a neutral expression if required.
- Avoid sunglasses, hats, and heavy accessories.
- Position the camera at eye level.
- Use a high-resolution image rather than a screenshot or social media download.
No passport photo resizer can completely fix a poorly taken photo. Starting with a clear image reduces the risk of rejection later.
Crop And Resize The Photo Carefully
Cropping and resizing are often confused, but they serve different purposes. Cropping determines what appears inside the frame, while resizing changes the final dimensions of the image. When preparing a passport size photo:
- Keep the head and shoulders centered.
- Leave enough space around the face.
- Match the required aspect ratio.
- Avoid stretching or squeezing the image.
- Ensure the face is not too close to the edges.
If you need a step-by-step guide to resize photo to passport size using online tools, mobile apps, or desktop software, this resource can help you compare different methods.
Taking a few extra minutes during this step can prevent common formatting errors.
Avoid Common Mistakes That Lead To Passport Photo Rejection
Many applications are rejected because of simple photo issues. Watch out for:
- Incorrect dimensions or aspect ratio
- Unapproved background colors
- Shadows on the face or wall
- Blurry images
- Poor passport photo quality
- Photos that are too dark or too bright
- Excessive beauty filters
- Smiling when a neutral expression is required
- Cropping off hair, chin, or shoulders
- Pixelated or compressed files
- Incorrect printing margins
A small mistake that seems harmless can still trigger a passport photo rejection, so double-check everything before submitting.
When Should You Use An Online Tool, App, Or Desktop Software?
The best option depends on your needs.
Use An Online Tool For Quick Resizing
Online services are convenient when you need country-specific templates, quick cropping, or instant downloads. Just be cautious about uploading personal photos to websites you do not trust.
Use A Mobile App For Fast ID Photos
Mobile apps are useful when you want to take a photo, crop it to passport size, and save the image directly from your phone.
Use Desktop Software For More Control
Desktop tools offer greater precision for pixels, DPI settings, print layouts, and image quality adjustments. They are often preferred when accuracy is especially important.
Improve Photo Quality Without Over-Editing
A passport photo should be clear and professional, but it should also remain natural. Minor adjustments may help improve a photo:
- Correct slightly dark lighting
- Reduce image noise
- Improve sharpness
- Enhance overall clarity
However, avoid altering facial features, changing skin tone, enlarging eyes, or applying strong beauty filters.
If an enhance passport photo workflow is needed after cropping or resizing, 4DDiG AI Photo Enhancer may be worth trying. It can be useful for improving clarity, reducing noise, brightening dull images, and sharpening facial details when the photo looks soft or low quality.
However, users should still follow the official photo requirements for their country or application type, as enhancement alone does not guarantee acceptance.
Quick Passport Photo Preparation Checklist
Before submitting your image, review this checklist:
- Confirm official size and format requirements.
- Use a clear, high-resolution original photo.
- Keep the background plain and acceptable.
- Make sure the face is centered and front-facing.
- Avoid beauty filters and heavy edits.
- Crop before resizing.
- Do not stretch the image.
- Save in the correct file format and size.
- Verify print dimensions if printing.
- Review the final image carefully before submission.
Common Questions To Briefly Address
When resizing your passport photo, here are a few things that you must be concerned about:
Can I take a passport photo with my phone?
Yes, as long as the image meets official size, quality, and background requirements.
Can I resize a photo to passport size online?
Yes. Many online tools can help with sizing and cropping.
Can I use a selfie as a passport photo?
Usually not. Selfies often create incorrect angles, shadows, or perspective distortion.
Is it okay to retouch a passport photo?
Light adjustments may be acceptable, but changes to facial features should be avoided.
What should I do if my passport photo looks blurry after resizing?
Use a higher-quality original image or consider an enhancement tool to improve clarity before submission.
Conclusion
It is entirely possible to resize a photo to passport size at home, but accuracy matters. The best results come from following official requirements, taking a clear photo, using the correct background, and carefully managing cropping and resizing.
Remember that editing tools can help refine a photo, but they cannot replace proper preparation. A clear source image is always the foundation of good passport photo quality.
If your final image appears blurry, noisy, or low-resolution after editing, a tool such as 4DDiG AI Photo Enhancer may be useful for improving clarity and sharpness while still keeping the photo natural and compliant with official guidelines.