When a video persistently fails to play and abruptly shows the 0xc10100be error, it might signify deeper structural inconsistencies. For users who demand seamless visual access, this kind of failure transforms their simple playback attempt into a moment of uncertainty. This is precisely where the relevance of understanding how to fix video issues becomes indispensable.
Instead of repeatedly switching players or reattempting downloads, recognize underlying structural faults and try to solve them. In this context, the following article covers all possible fixes with guidance to help you solve the 0xc10100be error.
Part 1. What Is Video Error 0xc10100be?
Part 2. Fix Stuttering Video Playback and Error 0xc10100be Step-by-Step
Part 3. 5 Tips: Prevent Jerky Brand Video Issues
Part 1. What Is Video Error 0xc10100be?
Video error 0xc10100be happens when attempting to play a video file that has been recently saved to your computer. This error indicates that the file format is unsupported by your media player, or the file extension is incorrect. Surprisingly, the error can occur due to missing or incompatible codecs or enabled copy protection feature in player.
Why Videos Become Jerky or Stutter?
To apply valuable fixes, review the reasons and understand what disruptions affect smooth frame delivery during viewing:

1. Unstable Internet Connection: Insufficient bandwidth represents one of the most frequent causes of jerky videos, especially when streaming 4K content.
2. Outdated Media Players or Browsers: Incompatible versions of media players, browsers, or video applications in use prevent them properly handling the latest video codecs.
3. Hardware Limitations and Insufficient Resources: Inadequate system resources, such as insufficient RAM or an aging graphics processing unit (GPU), can hinder video decoding.
4. Background Processes Consuming Resources: Multiple applications and processes running simultaneously in the background consume valuable system resources, leaving insufficient memory for video playback.
5. Graphics Driver Issues: Another notable reason is corrupted or incomplete graphics drivers that severely impact video playback quality and cause stuttering.
Part 2. Fix Stuttering Video Playback and Error 0xc10100be Step-by-Step
A complete understanding of how to fix video stuttering and the 0xc10100be error allows users to eliminate surface-level glitches. Instead of wasting time on jerky videos, follow the fixes discussed and solve the issue methodically:
Fix 1. Restart Media Player and System
Once you attempt to restart the media player and system, it clears temporary cache errors and resets the background processes. To restore normal decoding flow and allow the video to run without stuttering, follow the guided instructions:
Instructions. Press the “X” icon to completely close the media player application, then click the “Start” menu. Next, click the “Power” icon and choose the “Restart” option from the menu. Once the system is restarted, navigate to the media player icon from the desktop and try playing the video again.
Fix 2. Try Another Video Player
The next logical step to bypass potential compatibility limitations is switching to an alternative media player. This is vital because many advanced players come with built-in decoding support that can handle partially corrupted files. Soon, when the video plays in the alternative player, consider setting it as your default media player going forward.
Fix 3. Update Graphics Drivers
Consider updating graphics drivers, as they guarantee that the system’s hardware acceleration and rendering capabilities are fully optimized. Thus, follow the guidelines and reduce frame drops and decoding delays by updating graphic drivers for persistent 0xc10100be error:
Step 1. Enter Device Manager on your Windows, then expand the menu for “Display Adapter.” After this, right-click your graphics card name and select the “Update Driver” option from the menu.
Step 2. Move forward, click the “Search Automatically for Drivers” option, and let Windows update drivers to the latest version.
Fix 4. Disable Hardware Acceleration
You can disable hardware acceleration to resolve conflicts between GPU processing and video decoding pipelines. Adhere to the tutorial and prevent rendering glitches, and ensure that the video is processed more consistently through software decoding:
Step 1. Access your media player, then press the “Tools” tab and choose the “Preferences” option from the menu.
Step 2. From the “Simple Preferences” window, access the “Input/Codecs” section and select the “Disable” option for hardware-accelerated decoding.
Fix 5. Convert Video to Supported Format
Make use of Wondershare UniConverter to convert video into supported format and overcome the 0xc10100be error. This converter supports over 1000 formats along with batch conversion, allowing you to convert multiple videos immediately. Follow the simple tutorial and convert format for your either 4K or 8K video without losing quality:
Step 1. Download UniConverter, then click the “Add Files” button to insert all the error-displaying videos.
Step 2. Later on, extend the menu for “Convert To,” choose any other format from the options, and click “Convert All.”
Fix 6. Use Professional Video Repair Tool
In this context, use Repairit as a professional repair program to fix corrupted, damaged, or jerky videos. The program offers comprehensive solutions for a range of video corruption issues, with a 99.5% success rate. With its Quick Repair mode, you can experience fast restoration through an intelligent sample-polling algorithm and a massive sample library.
The Advanced Repair mode handles severely damaged videos, reconstructing almost all of their data that stutters. This exclusive feature analyzes the data and technology of the working sample file to reconstruct the jerky one. Most importantly, the platform ensures compatibility with the leading video editing software, including Premiere Pro and DaVinci Resolve.
Key Features
1. Support AI Video Enhancement: Beyond repair, the software includes AI-powered video enhancement features to restore clarity and details in blurry footage.
2. Format and Device Compatibility: The software supports mainstream and professional video formats captured from any mobile brand or action camera.
3. Multiple Platform Availability: It works on Windows and Mac, and includes an online version for quick repairs, while the desktop version handles severe corruption.
Comprehensive Tutorial to Repair Jerky Videos With Error
Follow a comprehensive repair-oriented approach for your videos that stutter or jerk while playing:
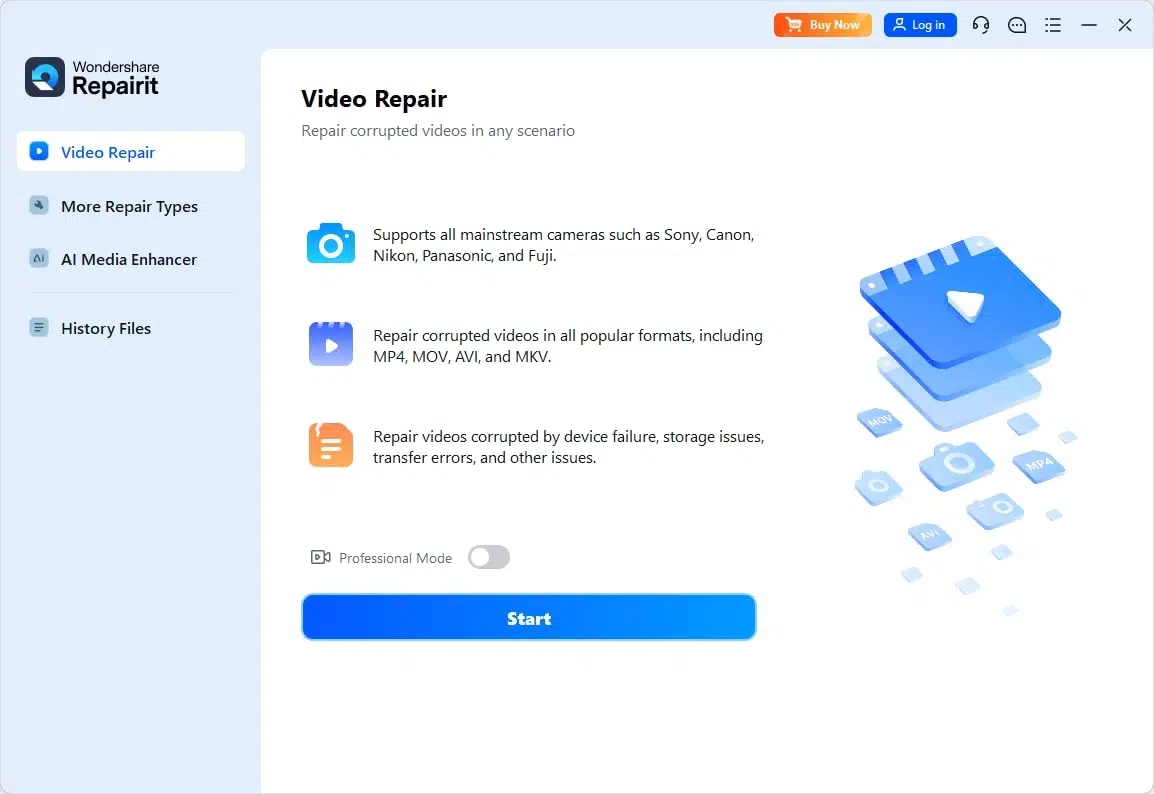
Step 1. Insert 0xc10100be Error Videos into the Tool
Initially, access the “Video Repair” section and press the “Start” button to add jerky videos.
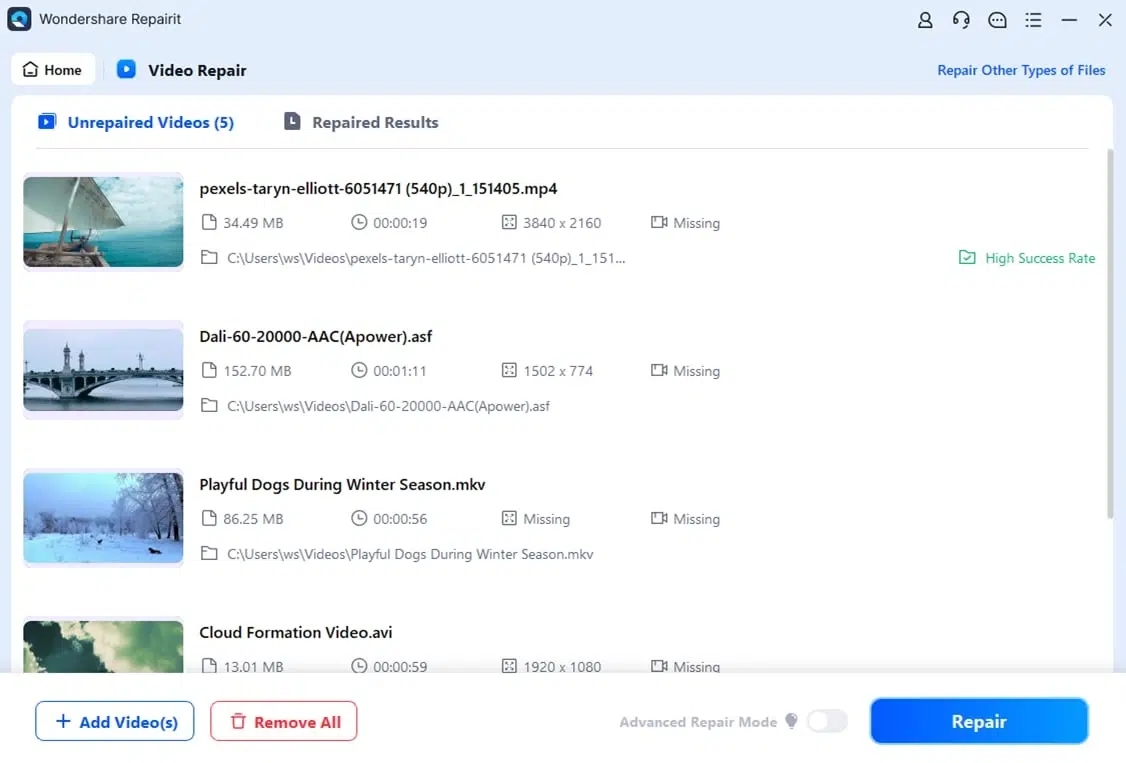
Step 2. Begin the Process of Repair
Later on, click the “Repair” button to start the quick repair of all jerky videos.
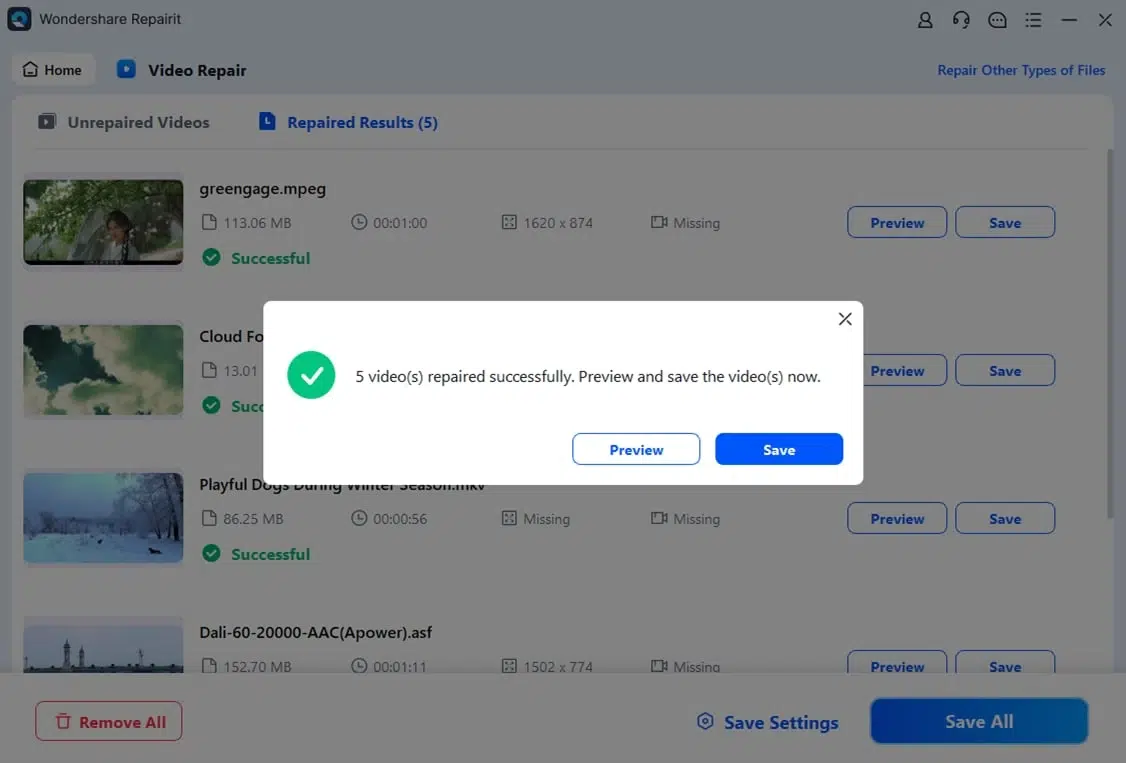
Step 3. Preview and Download the Video Files on the Device
In the end, examine the files and download the ones you’re completely convinced of.
Part 3. 5 Tips: Prevent Jerky Brand Video Issues
Read the following techniques for a better grasp of “how to fix videos” and prevent future jerky playback issues:
1. Use Proper Export Settings and Formats: Always export videos using appropriate compression settings that balance file size with quality to prevent stuttering during playback.
2. Maintain Consistent Frame Rates: Record all your brand videos at consistent frame rates throughout the entire project to ensure consistent playback.
3. Record with Quality Equipment and Settings: Use stable platforms like tripods to keep your camera steady during recording, as shaky footage can compound playback issues.
4. Keep System Hardware and Drivers Updated: Regularly update your graphics drivers to guarantee optimal video encoding and decoding performance.
5. Handle and Store Video Files Properly: Transfer video files carefully using reliable storage devices and stable connections to prevent corruption during copying.
Conclusion
Finally, to resolve persistent playback errors, you’ll need to understand the technical irregularities that destabilize modern media rendering environments. Either originating from fragmented encoding sequences, corrupted media structures, or incompatible codec frameworks, such disruptions progressively compromise playback fluidity. For better learning, the most suitable solution for “how to fix video” is to complete the video repair through Repairit.