Building your own computer used to seem intimidating. The technical knowledge. The risk of breaking expensive components. The complexity of putting it all together. But that perception is outdated. Building a computer today is actually pretty approachable. It’s more like adult Lego than rocket science. And you save money doing it yourself.
There’s something satisfying about building your own system. You know exactly what’s inside. You picked every component. You made every decision. If something goes wrong, you know how to fix it because you built it. And you save hundreds of dollars compared to buying a pre-built system.
The emergence of small form factor computers has made building even more accessible. A mini pc build doesn’t require specialized knowledge or special tools. You need a screwdriver. You need some patience. You need to follow instructions. That’s honestly about it.
Why Building Makes Sense
Pre-built computers cost money. A lot of money. You’re paying for labor. You’re paying for warranty support. You’re paying for the retailer’s markup. You’re paying for someone else’s profit.
When you build yourself, you eliminate all of that. You buy components at wholesale or close to wholesale prices. You’re paying for the parts, not the labor. The savings are significant. A five-hundred-dollar pre-built system might cost three-fifty if you build it yourself.
But it’s not just about money. When you build your own computer, you understand it. You know where everything is. You know how it all connects. If something goes wrong, you can troubleshoot it. You can upgrade parts without replacing the whole thing. You have control.
You also get exactly what you want. You don’t compromise. You don’t accept bundled software you don’t need. You don’t get stuck with components that aren’t quite right for your use case. You design the system to fit your needs precisely.
Starting Your Mini PC Build
A mini build starts with a case. The case is the foundation. Everything else builds around it. Choose your case first based on the size and form factor you want.
ITX cases are small. They’re designed for single-slot graphics cards and compact components. They’re perfect if you want something tiny. They’re challenging if you want big cooling solutions. But for most purposes, an ITX case is fine.
ATX cases are bigger. They fit bigger graphics cards. They have more space for cooling. They have more expansion slots. They’re bigger than you need for many applications, but some people prefer the extra space and cooling options.
After the case, choose a power supply. This is critical. A cheap power supply will fail. It might damage your components when it fails. A quality power supply is worth the money. You want something reliable. Something with enough wattage for your system plus headroom.
Then the motherboard. The motherboard connects everything. It sets the limits for what kind of processor and memory you can use. Choose based on what components you want to use. And make sure it fits your case.
The processor is next. Think about what you’re actually doing. Gaming needs a solid processor. General computing needs less. Video editing needs more. Match the processor to your actual needs, not some arbitrary performance benchmark.
Memory comes next. Sixteen gigabytes is solid for most uses. Thirty-two gigabytes if you do heavy multitasking or specialized work. Eight gigabytes is the minimum for comfortable computing in 2024.
Storage is critical. An NVMe solid-state drive for your operating system and main applications. Maybe a larger secondary drive for storage if you need it. Speed matters. Don’t skimp on storage.
The graphics card depends on your use case. No graphics card if you just do office work. A mid-range card for gaming or creative work. A high-end card if you demand serious performance.
Then cooling. CPU cooler. Case fans if needed. Thermal paste between the processor and cooler. Good cooling is essential. An overheated computer is a dead computer eventually.
Putting It All Together
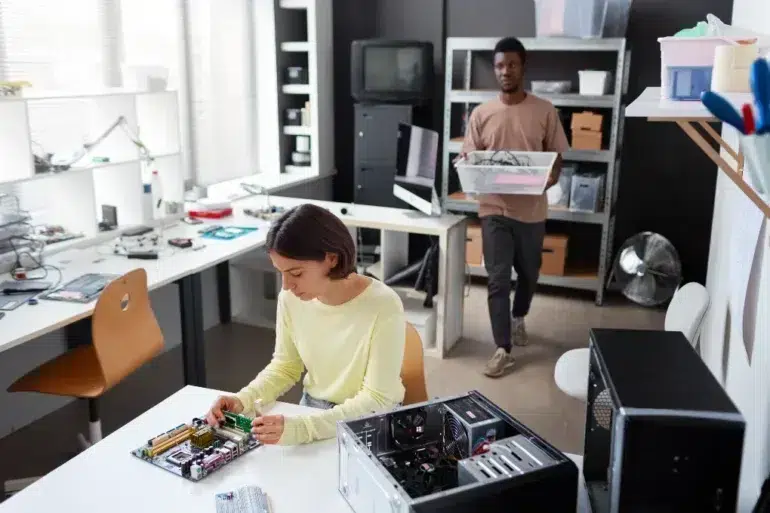
Assembly is surprisingly straightforward. You place the motherboard in the case. You install the CPU in the motherboard socket. You add the CPU cooler. You install memory sticks in the slots. You install the power supply. You connect power cables. You install the storage drives. You install the graphics card. You cable everything properly.
Each step is simple. Each step has guides online. YouTube has thousands of building tutorials. If you get stuck, there are communities of people who help.
The hardest part honestly isn’t the assembly. It’s the configuration after assembly. You need to install the operating system. You need to install drivers for your components. You need to configure settings. This takes time but it’s also straightforward. Follow instructions. Install things in order. Test as you go.
The Industrial PC Case Consideration
Standard cases work fine for most people. But if you’re building a system for an industrial or professional environment, you might want an industrial pc case. These cases are designed for different demands.
An industrial pc case handles vibration. It handles temperature swings. It handles dust. It handles accidental impacts. It’s designed to sit in a factory or warehouse, not on a desk in a climate-controlled room.
Industrial cases often have better cable management for permanent installations. They have security features. They have locks. They have good airflow for continuous operation. They’re built tough.
If you’re building a system that will live in a regular home or office, a standard case is fine. If you’re building something for industrial use or if you want extra durability, an industrial case is worth considering.
Component Selection Strategy
Buying components is easier now than ever. Online retailers have everything. Prices vary, so shopping around makes sense. Set a budget. Stick to it. Prioritize the components that matter most for your intended use.
For gaming, prioritize the graphics card and processor. For general computing, a mid-range of everything is fine. For creative work like video editing, prioritize processor and memory. For data processing, prioritize memory and storage speed.
Don’t be swayed by marketing. Don’t buy the most expensive version of anything just because it exists. Buy what actually makes sense for what you’re doing. Save money on things that don’t matter for your use case.
Testing and Validation
After assembly, don’t assume everything works. Test it. Boot it up. Watch for error messages. Check that all the fans spin. Check that the system stays cool. Run stress tests to make sure everything is stable under load.
Stress testing reveals problems that normal operation might not. A component might work fine under light load but fail under heavy load. Stress tests find those issues before they cause data loss or corruption.
If you find a problem, troubleshoot carefully. Is the component not seated properly? Is a cable not connected? Is a driver missing? Is the component actually faulty? Problems are usually fixable. It’s rare that something is actually broken.
Ongoing Maintenance
A computer you built yourself is easier to maintain. You know what’s inside. You can clean it. You can check cables. You can monitor temperatures. You can upgrade components as needed.
Regular cleaning helps with cooling and reliability. Dust buildup reduces cooling effectiveness. Dust also causes electrical issues. Clean your system every six months or so. It takes twenty minutes and makes a real difference.
Monitor temperatures. If your system is running hot, something is wrong. Maybe a fan failed. Maybe the cooler isn’t seated properly. Maybe there’s dust blocking airflow. Find the problem and fix it.
The Satisfaction Factor
There’s real satisfaction in building something yourself. It works because you made it work. You understand how it all connects. You feel ownership of the system. If something breaks, you know how to fix it.
This is especially true for mini pc build projects. A small system you built yourself feels like an achievement. It’s personal. It’s customized to your needs.
Building isn’t for everyone. Some people just want to buy something and use it. That’s fine. But if you’re even slightly curious about building, the barrier to entry is lower than ever. The resources exist. The components are available. The knowledge is freely shared.
Try it. Build your own system. You’ll probably be surprised at how accessible it actually is. And you’ll have a computer that’s exactly what you wanted, at a price that makes you feel good about the purchase.