A Tub Spout looks like a small detail, but it controls how water lands in the tub, how the diverter behaves, and whether you end up dealing with that slow, annoying drip that never goes away. A clean install also helps avoid wasted water, and that matters more than most people realize. The U.S. EPA notes that average household leaks can waste about 10,000 gallons of water a year. Even a “minor” bathroom leak adds up fast.
This guide walks through Tub Spout installation the way a careful DIYer would do it: identify what you have, gather the right tools, install it the correct way for your connection type, and finish with a neat, straight, leak-free result.
Know your Tub Spout type before touching a tool
Before anything else, identify how your current spout attaches. This single step prevents 90 percent of “why won’t it come off” frustration.
Most bath setups use one of these:
1) Slip-fit (set screw) Tub Spout
A slip-fit Tub Spout slides onto a smooth copper pipe and tightens with a set screw underneath. Moen explains an easy visual check: if you see a small hole on the underside and a screw inside it, that’s the slip-fit style.
What you’ll usually see:
- A small opening on the bottom of the spout near the wall
- A hex set screw inside that opening
2) Threaded (IPS) Tub Spout
A threaded Tub Spout screws onto a threaded pipe nipple coming out of the wall. With this style, there’s no set screw hole underneath. Moen’s guide describes the same quick check: no screw usually means threaded.
What you’ll usually see:
- No set screw opening on the bottom
- The spout rotates off by twisting counterclockwise
3) Adapter-based spouts
Some spouts use an adapter or “nose” system that fits onto a nipple and seals with an O-ring. Delta’s tub spout installation PDF shows threaded nipple sizing guidance and emphasizes using plumber tape or pipe dope for threaded connections.
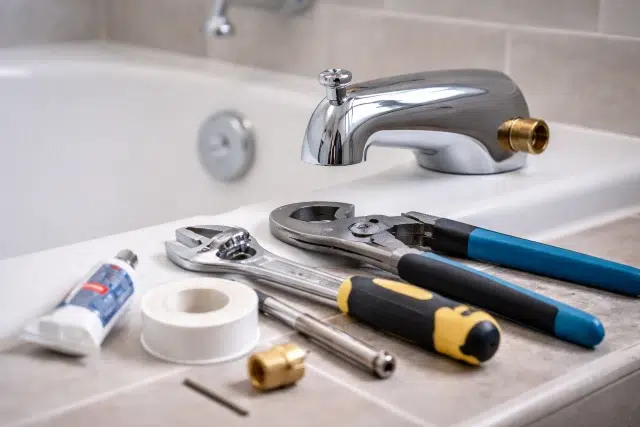
Tools you need for a smooth Tub Spout installation
Having tools ready keeps the job calm and prevents scratches, cracked caulk, and rushed mistakes. Not every job needs every tool, but these cover almost all installs.
Basic tools
- Adjustable wrench
- Channel-lock pliers (use with protection to avoid marring finishes)
- Allen key set (hex keys) for slip-fit set screws
- Flathead screwdriver (for gentle prying and cleanup work)
- Utility knife (for cutting old caulk lines cleanly)
- Measuring tape or ruler
- Flashlight or headlamp
Plumbing and finish supplies
- PTFE thread seal tape (commonly called Teflon tape)
- Pipe joint compound (optional, depending on manufacturer guidance)
- Silicone bathroom caulk (mildew-resistant)
- Soft cloth or microfiber towel
- Painter’s tape (helps keep caulk lines neat)
- Small wire brush or old toothbrush (to clean threads and residue)
Optional but very useful
- Strap wrench (removes a stubborn Tub Spout without chewing up the finish)
- Deburring tool or fine sandpaper (for cleaning a cut copper stub on slip-fit installs)
- Small level (to keep the spout visually straight)
- Replacement pipe nipple (threaded installs sometimes need a different length)
Prep work that makes the install look professional
This is the part people skip, and it’s why the spout ends up slightly crooked or leaks behind the wall.
1) Turn off water and relieve pressure
Even if you’re only swapping the Tub Spout, shut off water if you can, then open the tub valve to relieve pressure. It reduces surprise sprays and keeps the work area dry.
2) Protect the tub and the finish
Lay a towel in the tub. It catches dropped screws and keeps tools from chipping enamel.
3) Score old caulk first
If the old Tub Spout is caulked, run a utility knife along the edge where it meets tile or fiberglass. Scoring prevents pulling chunks of caulk or paint off the wall when the spout moves.
4) Take a quick “connection photo”
Snap a photo of the setup before removal. It helps later when you’re matching replacement parts or checking how far the pipe sticks out.
Removing the old Tub Spout without damage
Removal is simple when you know what you’re dealing with, but it’s also where most damage happens. Go slowly.
Removing a slip-fit Tub Spout
- Locate the set screw under the spout near the wall.
- Insert the correct Allen key and loosen the screw. Do not remove it fully unless it’s falling out.
- Pull the Tub Spout straight off the pipe.
If it’s stuck:
- Wiggle gently side to side while pulling.
- Add a few drops of penetrating oil around the pipe entry if corrosion is visible.
- Use a strap wrench for controlled grip.
Moen notes that slip-fit spouts typically loosen with a hex wrench, and the spout slides off once the set screw is loosened.
Removing a threaded Tub Spout
- Grip the spout firmly close to the wall.
- Turn counterclockwise (lefty loosey).
- If it resists, use a strap wrench or padded channel-lock pliers.
Go easy. Over-torquing can stress the plumbing behind the wall. If the pipe moves inside the wall, stop and reassess.
Measure the pipe or nipple so the new Tub Spout fits correctly
A Tub Spout is picky about pipe projection. Too short and it won’t seal. Too long and it won’t sit flush.
For threaded nipple installs
Manufacturers often specify how far the nipple should extend beyond the finished wall. Delta’s tub spout instructions show the nipple projecting about 1/2 inch to 1 1/4 inches from the finished wall surface, depending on the spout model and finish.
This is why measuring matters:
- If the nipple is too short, threads may not engage enough.
- If it’s too long, the spout bottoms out before it sits flush to the wall.
For slip-fit installs
You need:
- Clean, smooth copper (or the correct specified pipe type)
- Proper pipe length for the new spout design
- A burr-free edge so the O-ring can seal (if your model uses one)
If the pipe is rough or out-of-round, leaks and wobbles become much more likely.
Tub Spout installation steps for each connection type
Now for the main event. Pick the section that matches your setup.
How to install a slip-fit Tub Spout (set screw style)
Step 1: Clean and inspect the pipe
Wipe the pipe with a cloth. Remove old tape residue, mineral buildup, and any burrs.
Check for:
- Deep scratches where the spout seals
- Bent pipe
- Corrosion
If the copper stub is damaged, it’s better to fix the stub before installing a new Tub Spout.
Step 2: Dry fit first
Slide the spout onto the pipe without tightening anything. It should sit flush to the wall and feel stable.
If it doesn’t sit flush:
- The pipe may be too long.
- The spout may not match your pipe type.
- Debris may be blocking the internal stop.
Step 3: Align the spout
Rotate the Tub Spout until it looks straight and the diverter (if present) is centered and easy to reach.
Quick pro tip that saves time:
- Use a small level along the top edge, or visually line it up with grout lines.
Step 4: Tighten the set screw properly
Tighten until snug. Do not over-tighten. Over-tightening can strip the screw, deform the pipe, or crack plastic parts inside some designs.
After tightening:
- Pull gently to confirm it doesn’t slide.
- Twist lightly to confirm it doesn’t rotate.
Step 5: Seal the wall edge (if your setup needs it)
Many installs use a thin bead of silicone where the spout meets the wall to reduce water intrusion. Keep the bottom edge open if local practice requires drainage, but avoid leaving large gaps that invite splashes behind the trim.
How to install a threaded Tub Spout (IPS screw-on style)
Step 1: Clean the threads
Use a cloth and brush to clean old tape and residue from the nipple threads.
Step 2: Apply thread seal tape correctly
Wrap PTFE tape clockwise (the same direction you’ll screw the spout on). That way, the tape stays tight during installation.
Many DIY guides emphasize wrapping tape in the direction of installation, and Delta’s instructions include using plumber tape or pipe dope on the threads.
Step 3: Thread the Tub Spout by hand first
Turn clockwise and keep it straight. Hand threading prevents cross-threading, which is a common cause of leaks and damaged fittings.
Step 4: Tighten to snug, then align
Once it’s close to the wall, tighten until it sits flush and points straight down. Avoid “one more crank” behavior. Too much force can stress the plumbing.
A practical alignment move:
- If the spout tightens fully but stops slightly off center, the nipple length or thread engagement may be wrong. Adjusting nipple length (or using the manufacturer’s recommended adapter) is the correct fix, not brute force.
Step 5: Check the wall contact
A properly installed threaded Tub Spout sits flush against the finished wall with no rocking. If it rocks, the pipe may be angled or the wall surface may be uneven.
Pro tips for a perfect, leak-free Tub Spout finish
These are the small details that turn a basic install into a clean one.
Keep the pipe perfectly clean where seals touch
Slip-fit spouts often seal on the pipe surface. Any grit, solder bumps, or sharp edges can compromise the seal and cause drips.
Use a strap wrench instead of pliers on finished parts
A strap wrench grips without teeth. It prevents the scratched chrome look that makes new fixtures seem old on day one.
Avoid over-caulking
Caulk is not a structural fix for a loose Tub Spout. Caulk is a moisture barrier. If your spout is loose, fix the connection, then caulk neatly.
A clean caulk method:
- Mask with painter’s tape above and below the bead line.
- Apply a thin bead.
- Smooth with a damp finger or caulk tool.
- Remove tape immediately.
Confirm diverter performance after installation
If your Tub Spout has a diverter, test it.
Turn on water:
- In tub mode, water should flow cleanly from the spout.
- When the diverter is engaged, flow should switch to the shower head and stay there.
If water still spills from the spout while showering, common causes include:
- Worn diverter gate or seal
- Incorrect spout type for the valve setup
- Issues at the shower head restrictor or valve balancing
Watch for hidden leaks behind the wall
Leaks are not always visible right away. After installing a Tub Spout, run water for a few minutes and inspect:
- The wall area under the spout
- The tub deck (if applicable)
- The back side of the wall (if you can access it)
This matters because water damage is silent until it isn’t. Also, from a pure efficiency angle, the EPA highlights how common leaks waste thousands of gallons over time.
Common problems and quick fixes after installation
Problem: The Tub Spout won’t sit flush
Likely causes:
- Pipe nipple is too long or too short (threaded)
- Copper stub length is wrong (slip-fit)
- Debris or an internal stop is blocking full seating
Fix approach:
- Re-measure projection.
- Match the spout to the correct connection style.
- Follow manufacturer projection guidelines, like those shown in Delta’s installation document.
Problem: The Tub Spout wobbles
Likely causes:
- Set screw not tightened or stripped (slip-fit)
- Pipe stub is bent or undersized
- Thread engagement is weak (threaded)
Fix approach:
- Re-seat the spout, confirm alignment, retighten gently.
- Replace a damaged nipple or adapter if threads are worn.
Problem: Drip from the spout after shutting off
This isn’t always a Tub Spout install problem. Sometimes it’s the tub valve cartridge or seats.
Still, check:
- Thread seal tape coverage on threaded installs
- Pipe surface condition on slip-fit installs
- Internal O-ring condition if your model uses one
Problem: Scratched finish
This is why cloth wrap and strap wrenches matter. If it already happened, many finishes can be improved with non-abrasive polishing, but deep scratches usually stay.
A realistic example: swapping from a slip-fit to a threaded Tub Spout
This happens when someone buys a replacement without checking the connection type.
Scenario:
- Old spout had a set screw (slip-fit).
- New spout is threaded.
What happens:
- The threaded Tub Spout won’t install because there are no threads on the pipe stub.
The correct fix:
- Either return the spout and get a matching slip-fit model, or change the plumbing stub to the correct threaded nipple setup. Trying to force a mismatch usually creates leaks and wobble.
It’s a small example, but it shows why identification comes first.
Maintenance habits that keep a Tub Spout working longer
Even a perfect install can look bad fast if buildup starts.
Simple habits:
- Wipe the spout dry after heavy use if your water is hard.
- Clean gently with non-abrasive products to protect finishes.
- If the diverter starts sticking, clean around the mechanism and keep an eye on buildup.
Hard water often leaves chalky crust around outlets and seams, and over time those mineral deposits can affect flow and moving parts.
Conclusion
A Tub Spout installation is one of those projects that feels easy until one small detail is off: the wrong connection style, the wrong pipe projection, a dirty sealing surface, or a spout forced into alignment. Do the identification step first, use the right tools, and install based on your actual connection type, not guesses. Manufacturer guidance like Moen’s connection-type check and Delta’s pipe projection specs make the process far more predictable, and they help you finish with a straight, solid, leak-free result.
If hard water is part of the story in your bathroom, staying ahead of mineral deposits helps keep the diverter moving smoothly and the outlet flowing cleanly.